Saturday, March 29, 2014

Starting to KNIT!

I started to knit the whale.

I began with the whale's throat grooves, which I am knitting in the light grey wool. They run a little less than half the length of the whale, and will cover approximately the bottom third of the circumference of the whale's body.


The throat grooves are all going to be knit separately, and then sewn together without being blocked. Leaving them unblocked will allow them to curve outwards slightly between each seam, giving them that 'throat groove' look.


Each throat piece is 12 feet long, which, at this particular tension, works out to be 864 rows of knitting. They all start out at six inches wide, and gradually taper to two inches by the end of the groove.


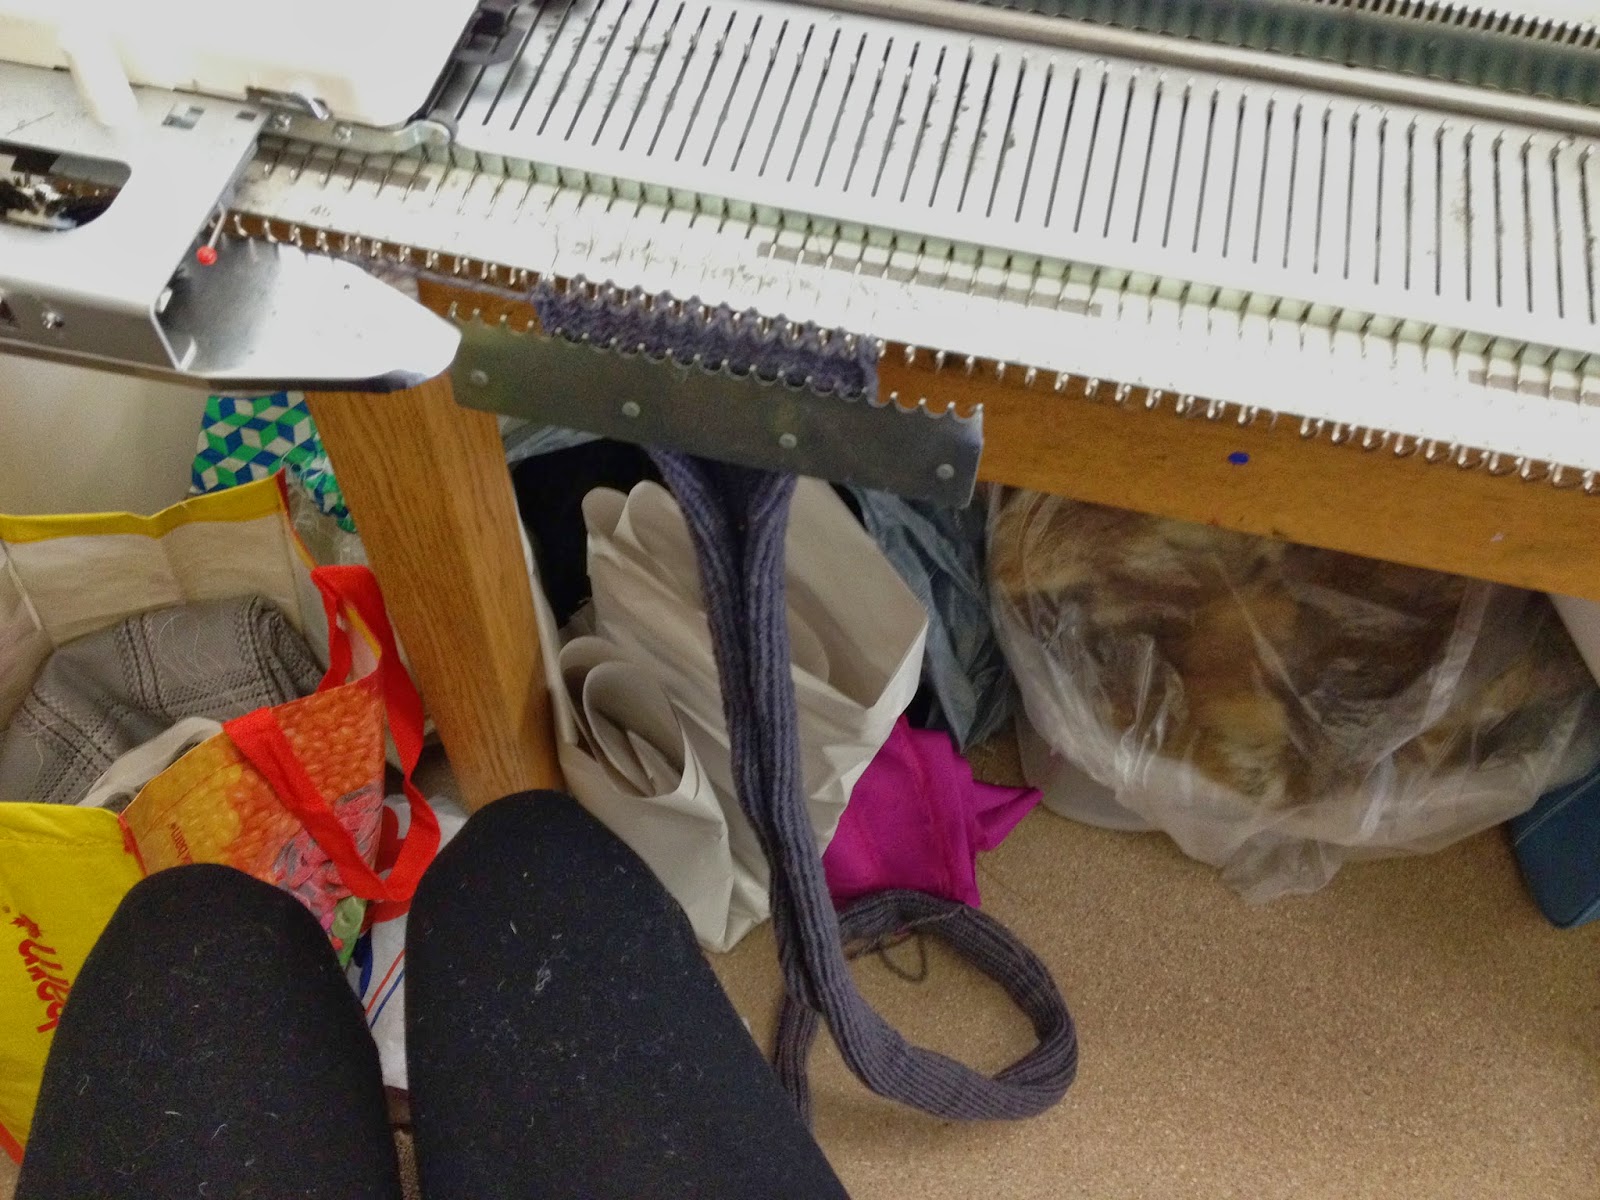
Here's a picture of me doing a decrease of one stitch, which is how the taper is created:


And, here's a throat piece all stretched out:


And a pile of throat grooves with mug for scale:


I'm really excited to have started knitting. I am having some concerns about not having enough wool, but it's cool to have finally gotten started on what is, for me, the most appealing part of the project. I plan to have the throat groove knitting finished by the end of the weekend, and likely start on the tail and fins next week.


Tuesday, March 25, 2014

Knit Fast Dye Yarn

While I've been busy building a whale this semester, the rest of my graduating class has also been working hard on some very cool stuff in preparation for our final exhibition and fashion show "Knit Fast Dye Yarn".  You can check out our class blog here, and see what they've all been up to!

The beginnings of our knit poster!

Friday, March 21, 2014

Progress

The sign that guards the whale skeleton


I got the remainder of the snow fencing on the whale this afternoon. The side went on pretty smoothly for the most part. I also reinforced the top spine with wooden dowels (and old broomstick handles), which fixed the issue of parts of the spine sagging in between attachment points.

Zip tying the dowels to the spine
So here's the spine, all covered in snow fencing. There's one spot that seems to be having issues, over on the right-hand end of the skeleton. I need to figure out how to get inside the snow fencing so that I can adjust where that slanted rib attaches to the bottom spine.


Providing I can solve that issue this weekend, as well as cover the whale in garbage bags, I'm scheduled to begin knitting early next week!


Friday, March 14, 2014

Covering the Skeleton

I started covering the skeleton in snow fencing today. The roll of fencing was 48 inches wide and 50 feet long, so I ended up cutting it in half (25 feet each), and using half to cover the top of the whale, and half to cover the bottom. I'm going to need one more roll, which should be more than enough for the two sides.


I also took some cord, cut it to the diameter of the two biggest ribs, and tied from top to bottom on each of them, which will stop them from elongating. They're nice and circular again now!

The snow fencing was fortunately super easy to work with, as it was very pliable. I used zip ties to attach it to the skeleton - one on either side where it's touching the ribs, and one in the middle to secure it to the spine. When I put the side pieces on, I'll also attach those to the top and bottom pieces of fencing to keep everything secure. 

And, once the fencing is all in place, I'll pin pieces of fabric onto the skeleton that I'll then use as pattern pieces for my knitting. As I'm knitting, I'll shape the knit fabric to roughly match the pattern pieces, and then do the more precise shaping when I'm sewing them together.


Wednesday, March 12, 2014

Natural Dye Paintings

There's not much to report on the whale end of things, as I'm spending most of this week waiting for wool to dry and winding it up. The snow fencing, hopefully, will go on the whale on Friday.

So, in the meantime, here's another of the projects that I've been working on: my natural dye paintings. Basically, these are paintings done with natural dyes on silk that feature a stencilled rice paste resist. I'm doing three paintings, each with a different kind of bird for the stencil design.

First, I traced my design onto smoked mulberry paper, (which is what will be used for the actual stencil) and then cut it out.


Then, using the stencil, I applied the rice paste to the silk. For the hummingbird and the seagulls, I was able to push the rice paste through the stencil in a similar way to how you'd screen print something:


But that technique wasn't really working out for the mockingbird, so I ended up painting the rice paste on:


So here's the silk after the rice paste had been applied:


After the rice paste dried, I could begin painting. The rice paste acts as a resist and is rinsed out when the painting is finished, meaning that any parts of the silk covered by the paste during the painting process will be white when it's all finished. The paints themselves are natural dye pigments that are mixed with soy milk (the soy milk helps to bind the pigments to the cloth).

The picture below shows all my stuff set up for painting. The silk has to be suspended on frames during the painting so that the dye paints can't run onto to another part of the cloth like it would if it was sitting on the table.


And here are all my paints set out:


The mordants that I'm using for the dyes can really seep into and stick to the paintbrush bristles, so to make sure that my colours are not affected by any cross-contamination, they all get their own brush. Which is labelled with the mordant that that brush is designated for.


To achieve the best colours, the dye has to be built up over numerous layers. I aim to get five or six layers on my paintings. Once all the layers are on, and dried, the paintings have to sit for a few months before the rice paste can be rinsed out. Because the dye isn't being heated to set it, it has to be set with time. I'm planning to rinse mine near the end of May, just before my graduate exhibition is set up, which is as much time as I have to give them!


Saturday, March 8, 2014

Wool Progress

So, I'm still in the process of rinsing out the wool, (There's a lot. It's taking a long time.) but some of it is done! Here it is drying:


And here is some of it next to the lighter stuff for colour comparison:


The stuff in the picture above is probably the lightest out of all the dark stuff, so most of it has an even bigger contrast with the lighter stuff, which is cool.

And here's the rest of it, waiting to be rinsed:


I've also begun the lengthly process of winding the wool, starting with the light grey. Here's my yarn swift/ball winder combo setup:


For those who may not be avid yarn enthusiasts, here's how it works. The skein of wool goes around the wooden swift, which can expand or collapse depending on the circumference of the skein. 


One end of the yarn is then attached to the ball winder, which is set up a couple of feet away from the swift.


When the handle of the ball winder is turned, the ball winder rotates, spinning the yarn around it as it is pulled away from the swift, which also rotates to feed out the yarn. Until you get this!


And here's a little peek at my most recent project...


I'm knitting it with strips of silk chiffon (above) as well as a really lovely alpaca/merino blend!


Thursday, March 6, 2014

Happy Blog Birthday! Also, Whale Wool.

Happy one month birthday, blog! (Belated, actually. It was yesterday.)

Anyway, the wool is dyed. It's looking pretty great. (Pictures to come soon... my phone ran out of storage space because of all the wool pictures I have on it...)

Now to spend all weekend (week?) winding it into usable balls so that I can begin to KNIT!

Woohoo!

Monday, March 3, 2014

Dyeing the Wool (Part III)

Providing everything goes well during the next couple of days, this should be my final post about dyeing the wool!

This morning I took the remaining two thirds out of the mordant and got ready to dye it. The particular dye that I'm using is an extract, which means that it's very concentrated. To dye the light-medium grey wool, I only needed to use 1% weight of fibre (that would be the wool). That meant that those 29 skeins required 31.9g of dye. The remainder of the wool, which is what I'm dyeing now, I wanted to be a significantly darker colour, so I chose to use 3% WOF. As I was dyeing 59 skeins this time instead of 29, I needed to use 194.7g of dye.

Here I am, weighing it:


Almost enough!

Once the dye had been measured out, I stirred it into a pot of hot water to make sure it was fully dissolved before adding it to the larger container.


The bubbles on top here look kind of orange-y, which they are. The dye, when it's in a really concentrated form, tends to appear red. Apparently this results in orange bubbles. 

It definitely looked pretty purple when it got added to the dye vat, though. Here (below) you can see that, thanks to the hose, the container is getting filled up with water while I'm doing all that dye measuring and mixing. You can also see my wool in the background, anxiously waiting to hop back in there!


As I mentioned previously, the 59 skeins does all fit in the container, but without tons of space to move around. So, when I added the wool to the dyebath, I stirred it, A LOT, and am continuing to give it a good stir every half hour. I'm hoping that by the time I leave school this evening, it will have been stirred enough that it should be fine overnight.

It is looking like a very promising colour so far, though! I'll probably end up leaving it in there for several days to make sure that it gets as dark as possible.